


목차
Class TransFormer를 이용해 정보 필터링하기
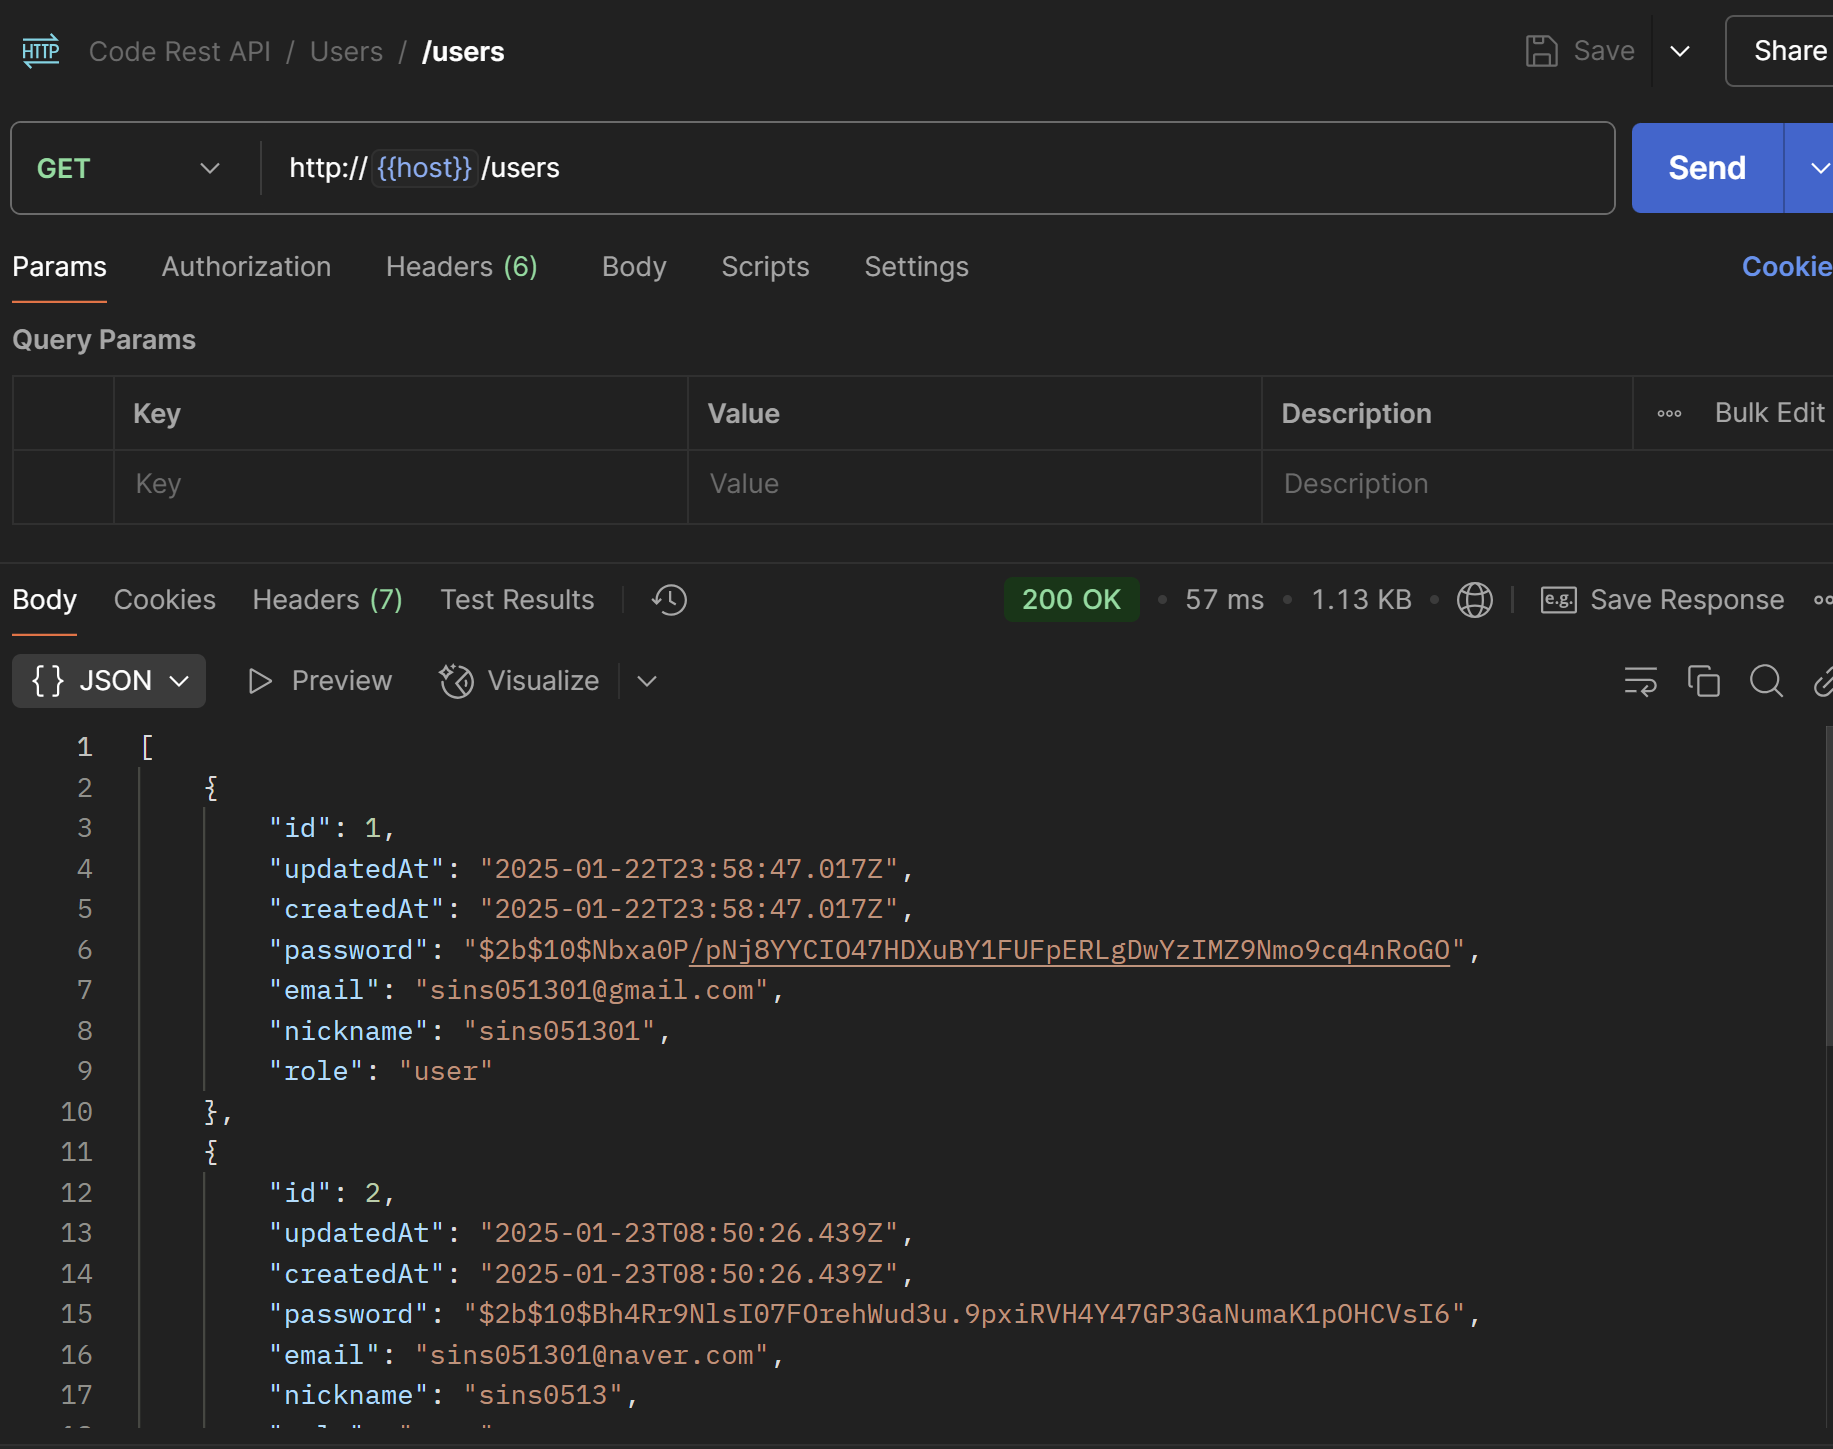
우리가 기존에 만들었던 유저의 정보를 가져오는 요청을 보면 다음과 같이 모든 정보를 필터하지 않고 가져오는 것을 볼 수있다.
이때 우리는 exclude라는 annotation을 활용할 수 있다.
응답때만 password 반환을 막아야 하므로 toPlainOnly를 설정하면 된다.
 /**
   * Request
   * frontend -> backend
   * plain object (JSON) -> class instance (dto)
   *
   * Response
   * backend -> frontend
   * class instance (dto) -> plain object (JSON)
   *
   * toClassOnly -> class instance 변환될때만
   * toPlainOnly -> plain object로 변환될때만
   */
 @Column()
  @IsString({
    message: stringValidationMessage,
  })
  @Length(3, 8, {
    message: lengthValidationMessage,
  })
  @Exclude({
    toPlainOnly: true,
  })
  password: string;
아래와 같이 적용할 곳에 UseInterceptors를 쓰고 안에 ClassSerializerInterceptor를 넣어 직렬화를 시켜주면 된다.
 @Get()
  @UseInterceptors(ClassSerializerInterceptor)
  getUsers() {
    return this.usersService.getUser();
  }
  /**
   * serialization -> 직렬화 -> 현재 시스템에서 사용되는 (NestJs) 데이터의 구죠를 다른 시스템에서도
   *                            쉽게 사용 할 수 있는 포맷으로 변환
   *                        -> class의 object에서 JSON 포맷으로 변환
   * deserialization -> 역직렬화
   */

하지만 이 방식의 문제점이 있는데 적용할 곳에 일일히 UseInterceptors를 쓰고 안에 ClassSerializerInterceptor를 넣어야 한다는 점이다. 따라서 우리는 이것을 일반적으로 적용시켜 줄 필요가 있다.
app.module.ts에 전체 적용하기
app.module.ts에 제공해 주면 다음과 같이 ClassSerializerInterceptor를 적용할 코드에 넣어 주지 않아도 된다.
 providers: [
    AppService,
    {
      provide: APP_INTERCEPTOR,
      useClass: ClassSerializerInterceptor,
    },
  ],
아래와 같이 이제 넣지 않아도 잘 작동하는 것을 볼 수 있다.
 @Get()
  getUsers() {
    return this.usersService.getUser();
  }

Expose 사용해 보기
우리는 민감한 정보를 선택적으로 들어내고 싶다면 class전체에 @Exclude()를 해준 후
원하는 프로퍼티에 @Expose()를 해주면 된다.
import { Column, Entity, OneToMany } from 'typeorm';
import { RolesEnum } from '../const/roles.const';
import { PostsModel } from 'src/posts/entities/posts.entity';
import { BaseModel } from 'src/common/entity/base.entity';
import { IsEmail, IsString, Length } from 'class-validator';
import { lengthValidationMessage } from 'src/common/validation-message/length-validation.message';
import { stringValidationMessage } from 'src/common/validation-message/string-validation.message';
import { Exclude, Expose } from 'class-transformer';

@Entity()
@Exclude()
export class UsersModel extends BaseModel {
  @Column()
  @IsString({
    message: stringValidationMessage,
  })
  @Length(3, 8, {
    message: lengthValidationMessage,
  })
  @Exclude({
    toPlainOnly: true,
  })
  password: string;
  /**
   * Request
   * frontend -> backend
   * plain object (JSON) -> class instance (dto)
   *
   * Response
   * backend -> frontend
   * class instance (dto) -> plain object (JSON)
   *
   * toClassOnly -> class instance 변환될때만
   * toPlainOnly -> plain object로 변환될때만
   */

  @Column({
    //2)
    unique: true,
  })
  //1) 길이가 20을 넘지 않을 것
  //2) 유일무이한 값이 될 것
  @IsString({
    message: stringValidationMessage,
  })
  @IsEmail(
    {},
    {
      message: stringValidationMessage,
    },
  )
  @Expose()
  email: string;

  @Column({
    //1)
    length: 20,
    //2)
    unique: true,
  })
  @IsString({
    message: stringValidationMessage,
  })
  @Length(1, 20, {
    message: lengthValidationMessage,
  })
  @Expose()
  nickname: string;

  // @Expose()
  // get nickNameAndEmail() {
  //   return this.nickname + '/' + this.email;
  // }

  @Column({
    type: 'enum',
    enum: RolesEnum,
    default: RolesEnum.USER,
  })
  role: RolesEnum;

  @OneToMany(() => PostsModel, (post) => post.author)
  posts: PostsModel[];
}
강의출처
[코드팩토리] [초급] NestJS REST API 백엔드 완전 정복 마스터 클래스 - NestJS Core 강의 | 코드팩토리 -
코드팩토리 | 자바스크립트, 타입스크립트 다음은 백엔드 개발! NestJS를 이용한 REST API 백엔드 개발, Socket IO 개발 및 배포를 할 수 있게 됩니다., 백엔드가 처음이어도 누구나 OK! 트렌디한 NestJS로
www.inflearn.com
'코딩 정보 > NestJs' 카테고리의 다른 글
| [NestJs] 페이지 기반 페이지네이션을 만들어 보자 (0) | 2025.01.29 |
|---|---|
| [NestJs] 커서 기반 페이지네이션을 구현해보자 (0) | 2025.01.29 |
| [NestJs] DTO란 무엇이고 사용방법에 대해 알아보자 (0) | 2025.01.27 |
| [NestJs] 포스트맨 로그인 간편화 해보자 (0) | 2025.01.27 |
| [NestJs] 토큰 가드를 구현해보자 (0) | 2025.01.24 |